
Welcome back to my blog, I can’t believe it’s already week 6! I feel like these past few weeks have flown by in the lab. I am realizing just how much I have learned in this internship and I am so grateful to everyone who made it happen! My time in the Dorris Neuroscience Center working with my amazing mentor Cailynn Wang is coming to a close, but I am so lucky to have learned all that I did and I cannot wait to share this week’s updates with you.
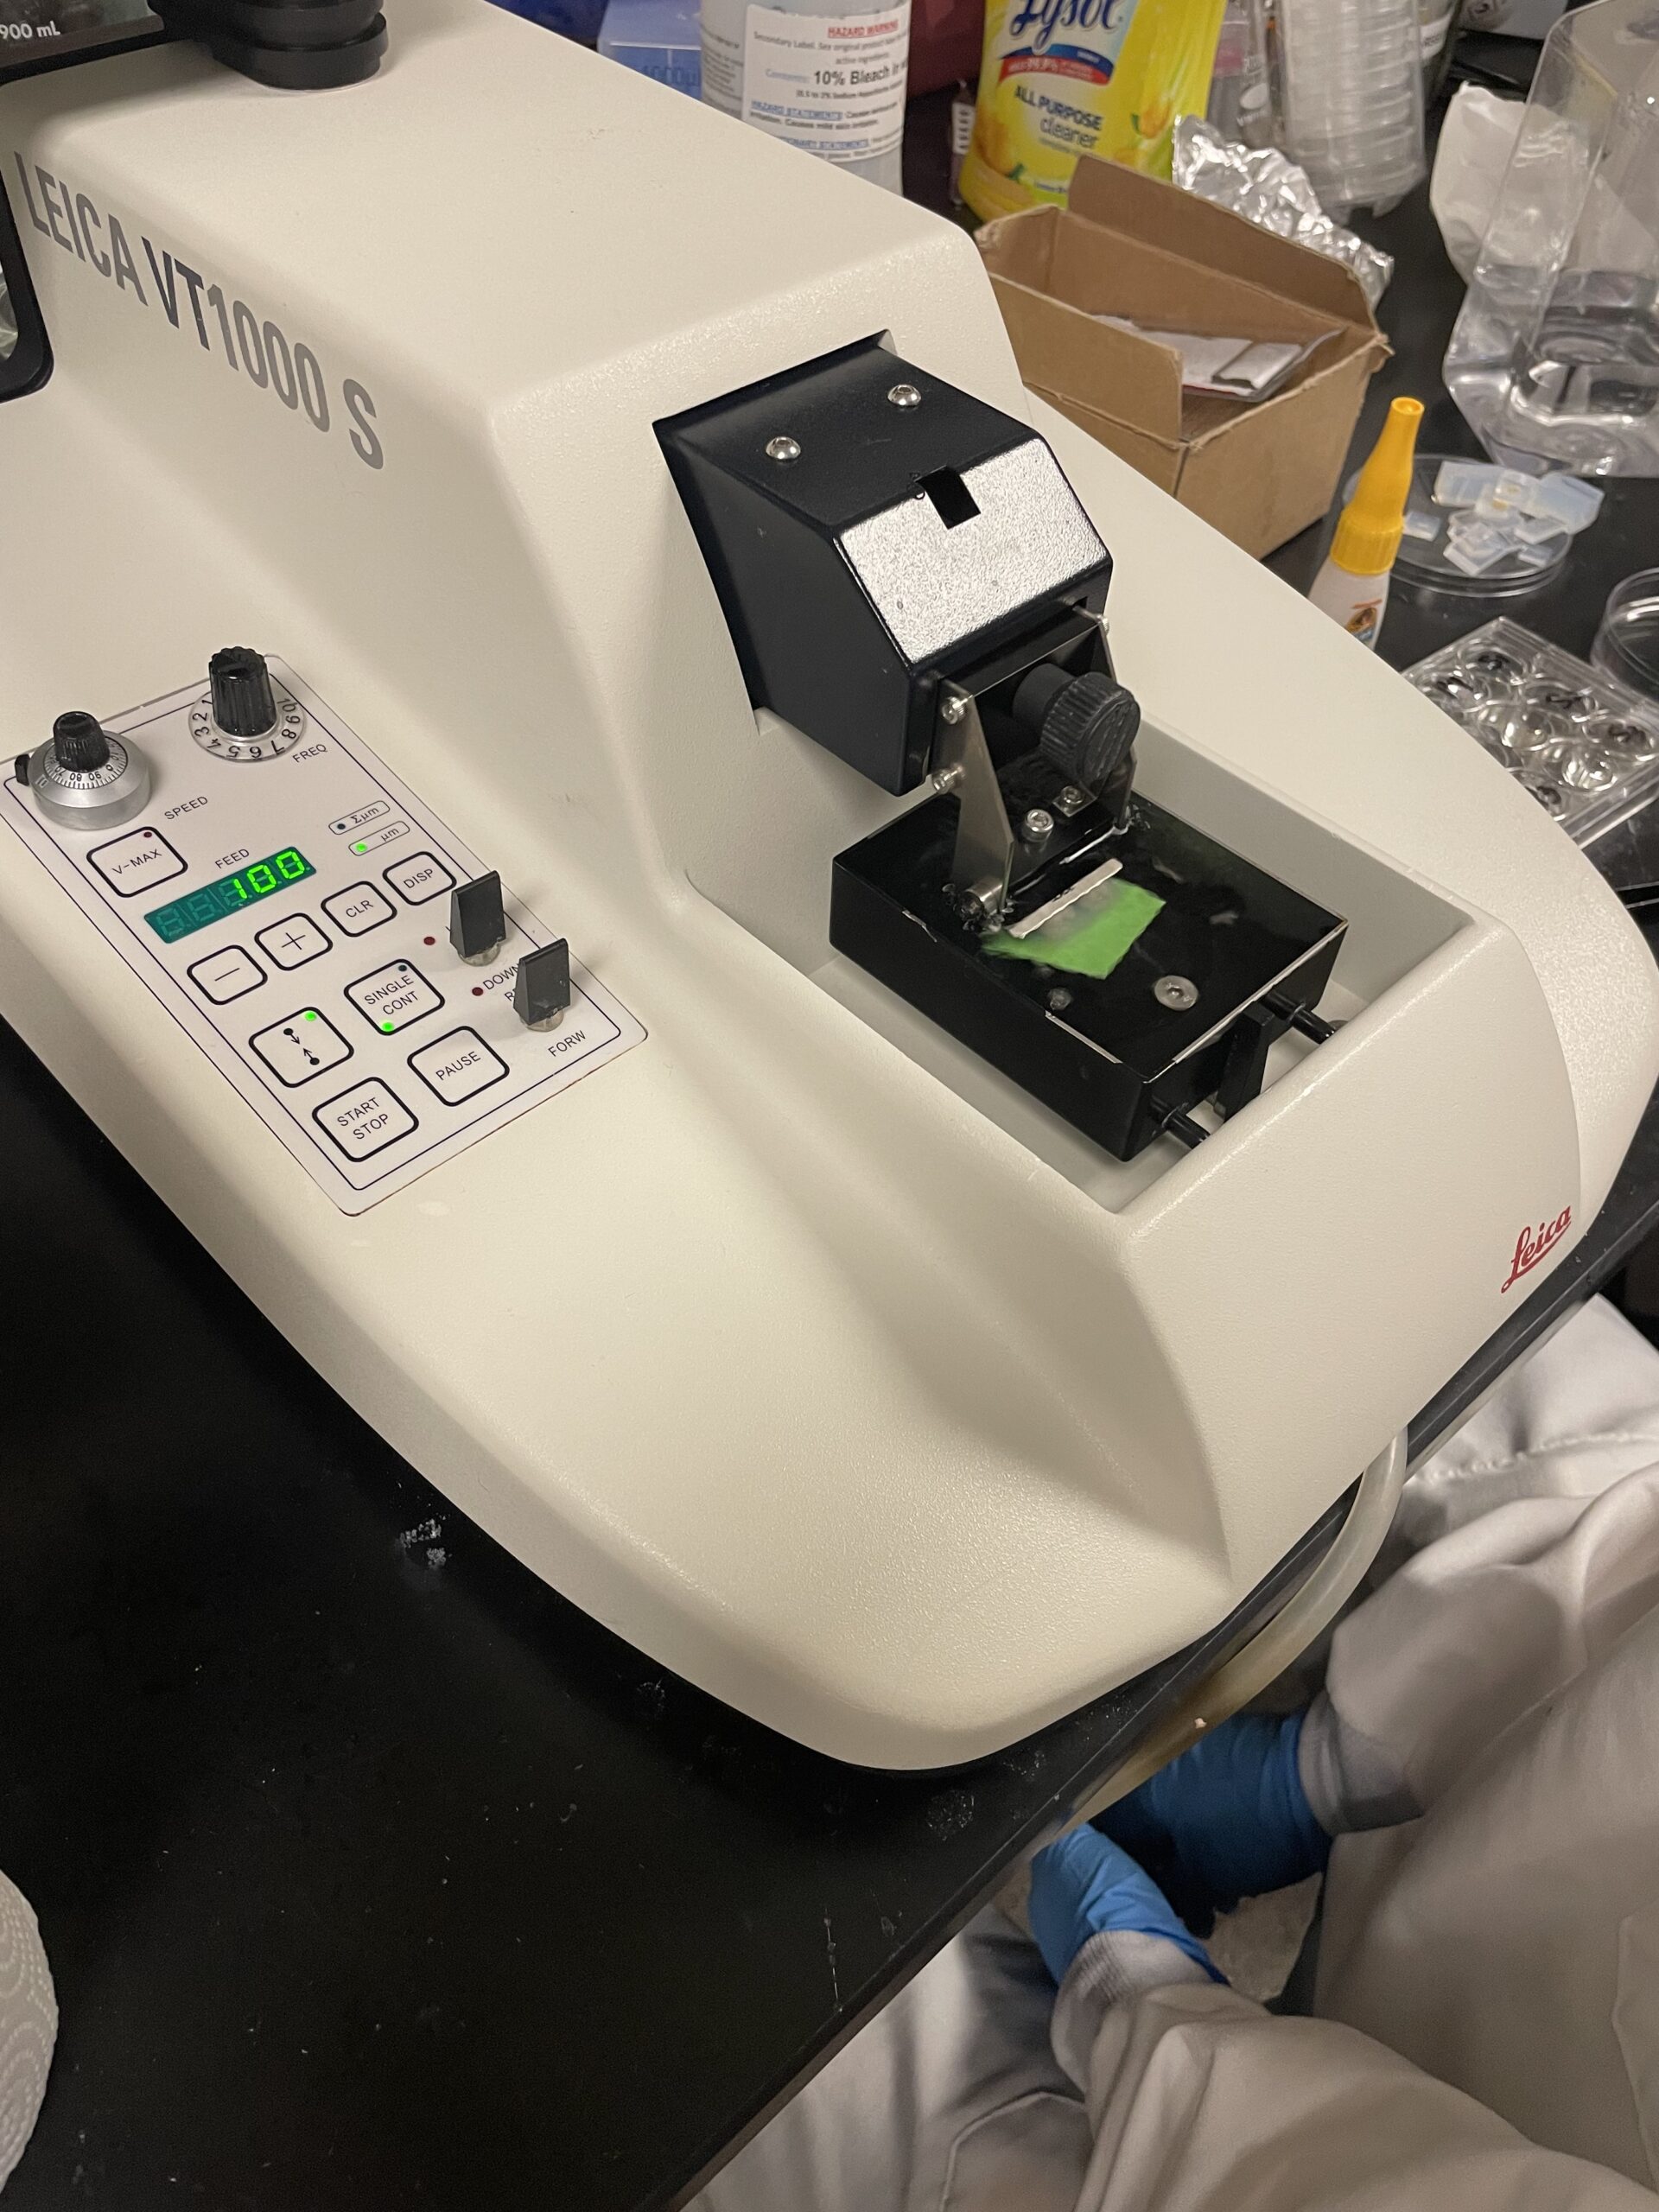
The vibratome. It uses a horizontal blade and very slow, constant speed to slice an organ into very thin sections.
Monday began with the usual lab meeting, this time one of the post-docs presented her data update on glucose metabolism in the brain during learning. It was very interesting to see the differences between the amount of glucose consumed when a mouse is exposed to a new maze than when they are placed in a familiar one because they use so much more glucose in the new maze. After lunch, I helped Cailynn embed her 9 brains from last week’s pre-blocking experiment in agarose in preparation for sectioning with the vibratome. Cailynn prefers the vibratome to the cryostat because it is more efficient for many brains and better upholds the tissue integrity. After letting the agarose-embedded brains cool for 1 hour, Cailynn showed me how to properly set up the vibratome and left me on my own to section all her brains. I was a little surprised that she trusted me with her experiment and doing something I’d never done before on my own, but it turns out that the vibratome is very user-friendly and all I had to do was transfer the slices into wells of PBS after the vibratome sectioned them. After sectioning, I ended the day by making the A1P4 cocktail under the fume hood and transferring Cailynn’s and my tissue samples into 30mL tubes to incubate overnight in the cold room.
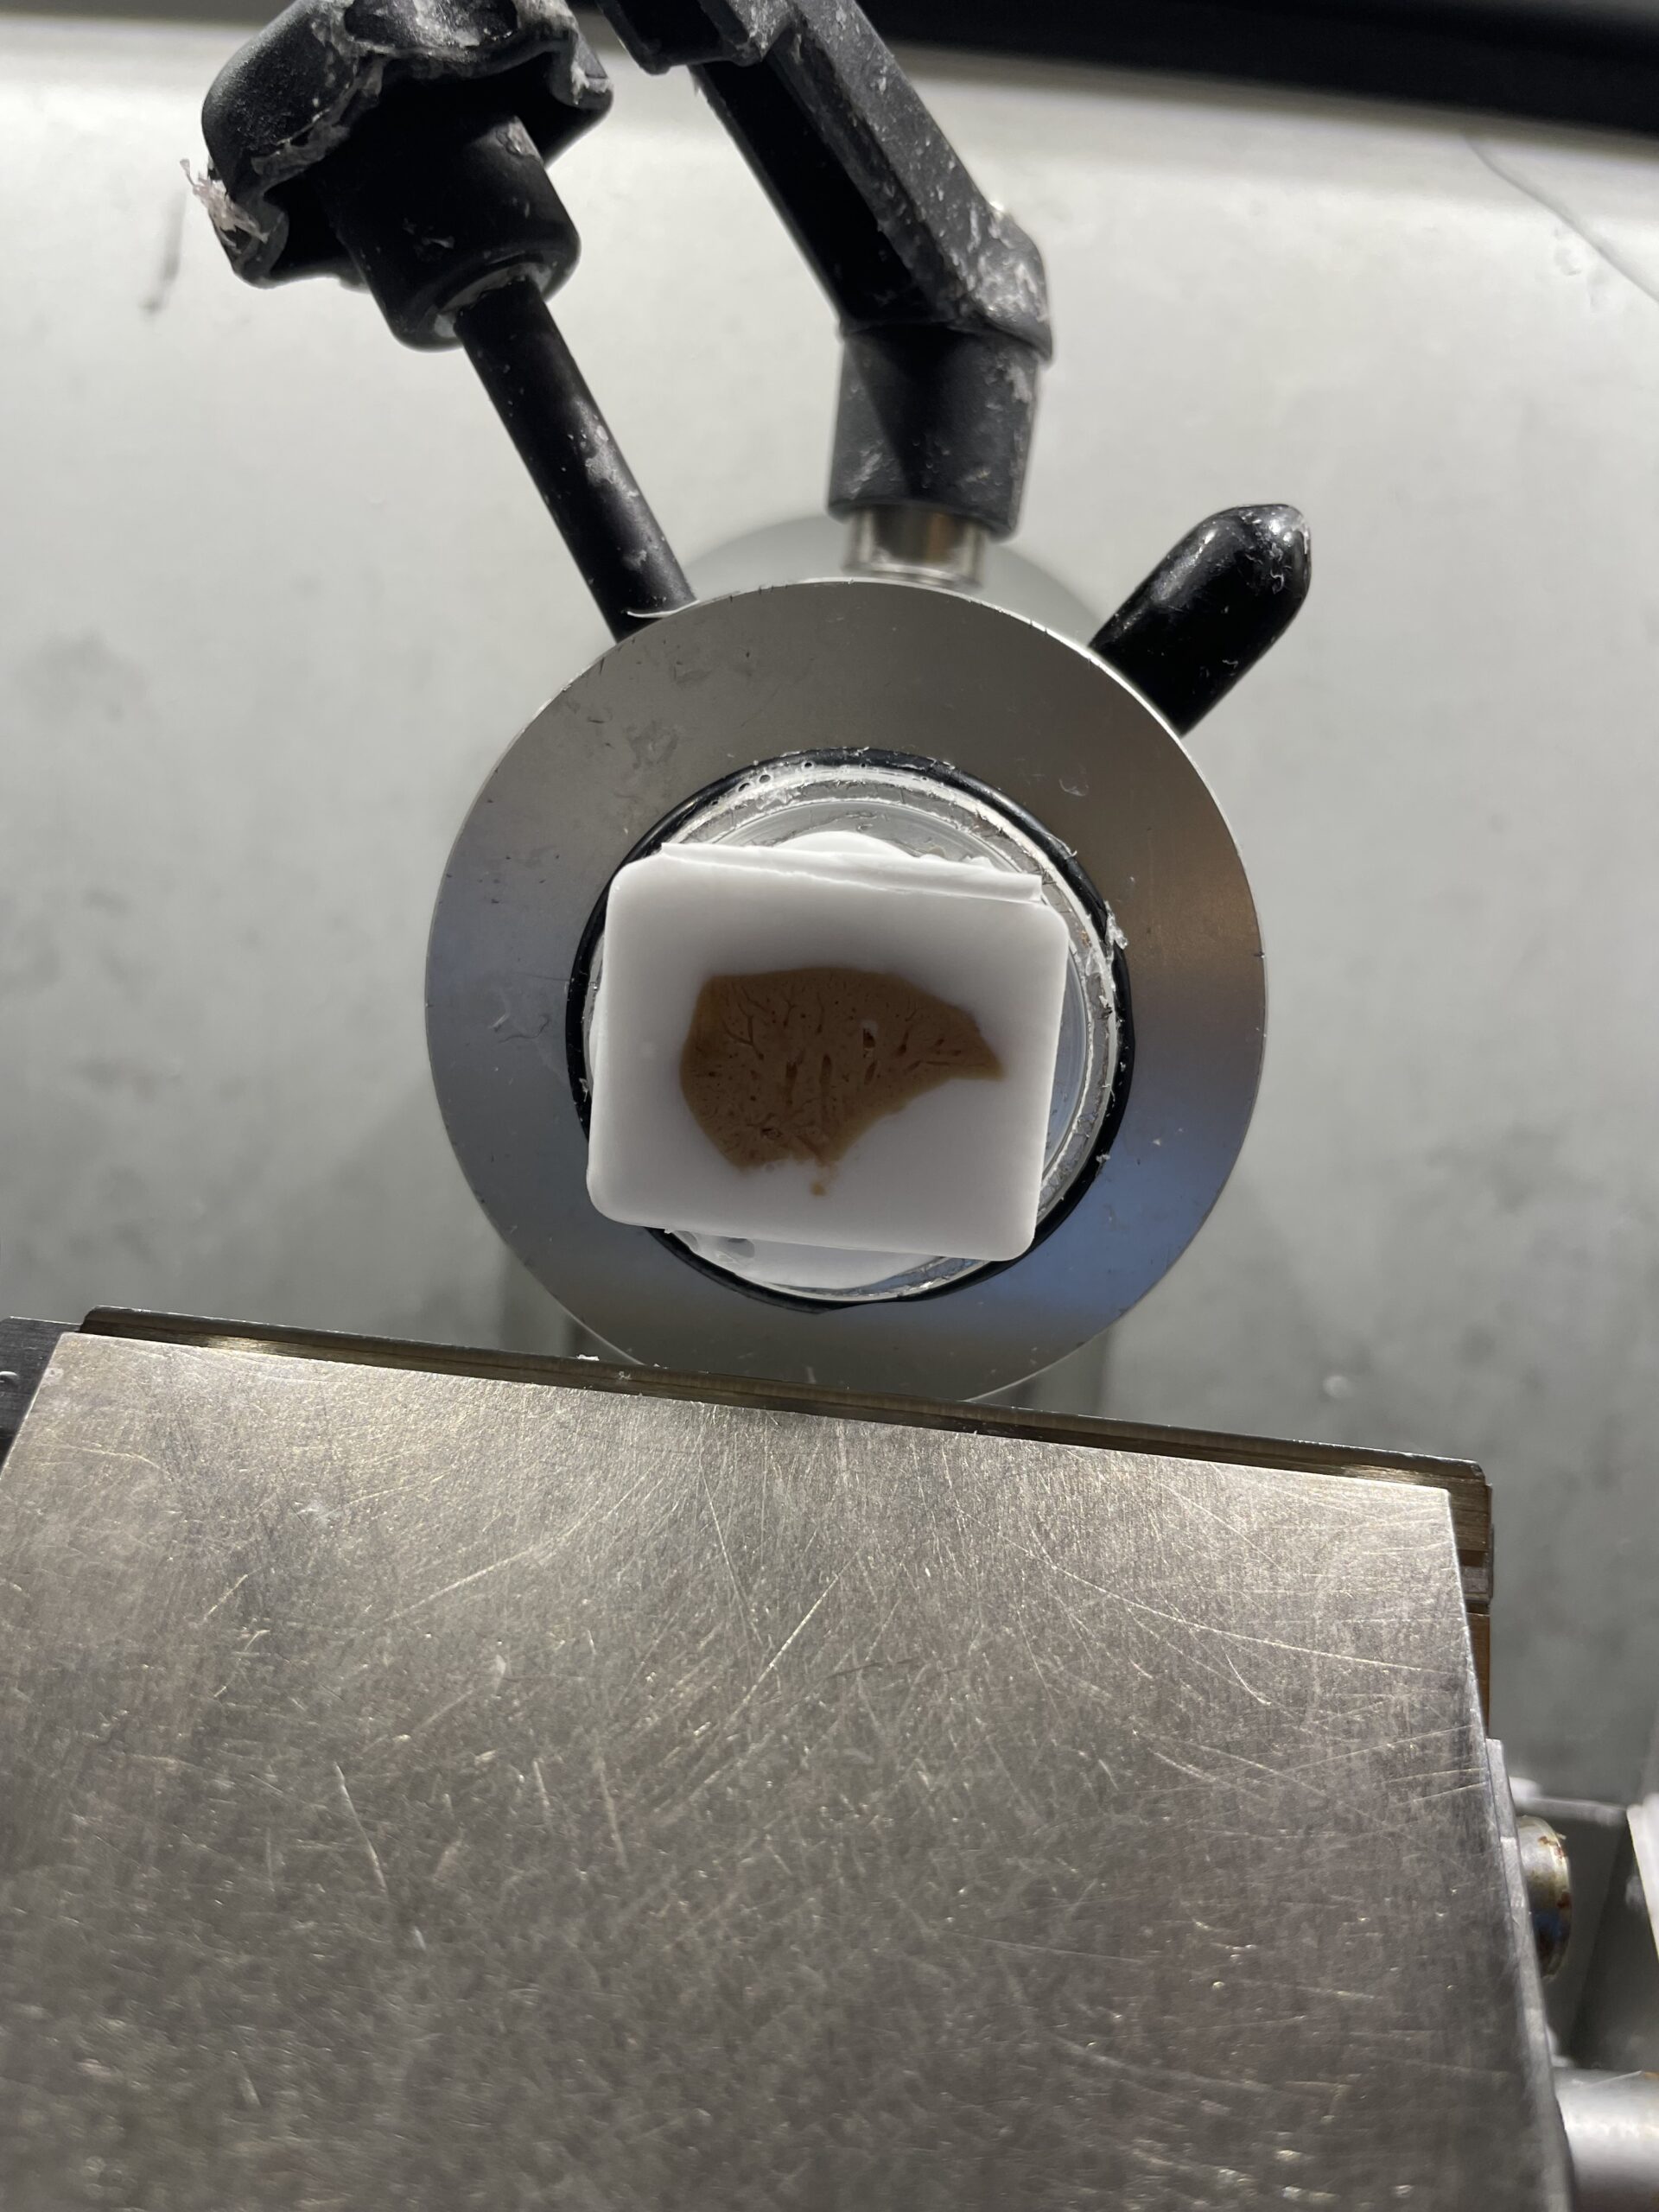
My liver frozen in OTC and mounted on the cryostat to be sectioned.
Tuesday morning started with a surprise lecture from a visiting PhD scientist about tissue clearing, particularly the clearing of whole systems and organs, which is similar to the process utilized in Cailynn’s research with CATCH. Later, I de-gased the combined sample (my experiment plus Cailynn’s) in the vacuum chamber by infusing nitrogen gas to remove all oxygen from the tubes. This is a critical step before the process of polymerization can start because if any oxygen remains in the tissue during polymerization, the crosslinking that occurs can bind to the oxygen, creating bubbles that damage the tissue integrity or cause non-specific, unwanted bindings to happen. I then put our samples onto the warm incubator (37 C) to polymerize for 4 hours. While I was waiting for the cross linking/polymerization to finish, I returned to the cryostat to section my now-fully-dehydrated kidneys and livers. This time I had a much easier time using the cryostat after remembering to not use the glass cover. Unfortunately, after I was done sectioning and the polymerization wait was over, Cailynn informed me that something wasn’t right and there was unknown condensation in the tubes. She had no idea what could have happened, although a similar problem also happened to Ben, and we concluded that one of the reagents in the A1P4 mixture likely was too old and hadn’t worked properly. Consequently, we had to wash the samples in PBST and remake the A1P4 and re-incubate the samples and redo polymerization on Wednesday. Although it wasn’t necessarily a big deal because the polymerization step can be repeated without causing damage to the tissue, it did screw up my very tight timeline because we still needed to polymerize for one day, wash with SDS for 2, and incubate with copper for another one day. This would put imaging outside of my time at the lab, so Cailynn and I decided to only wash with SDS for one day and hope that the tissue would be cleared enough to visualize without too many lipids obstructing our view.
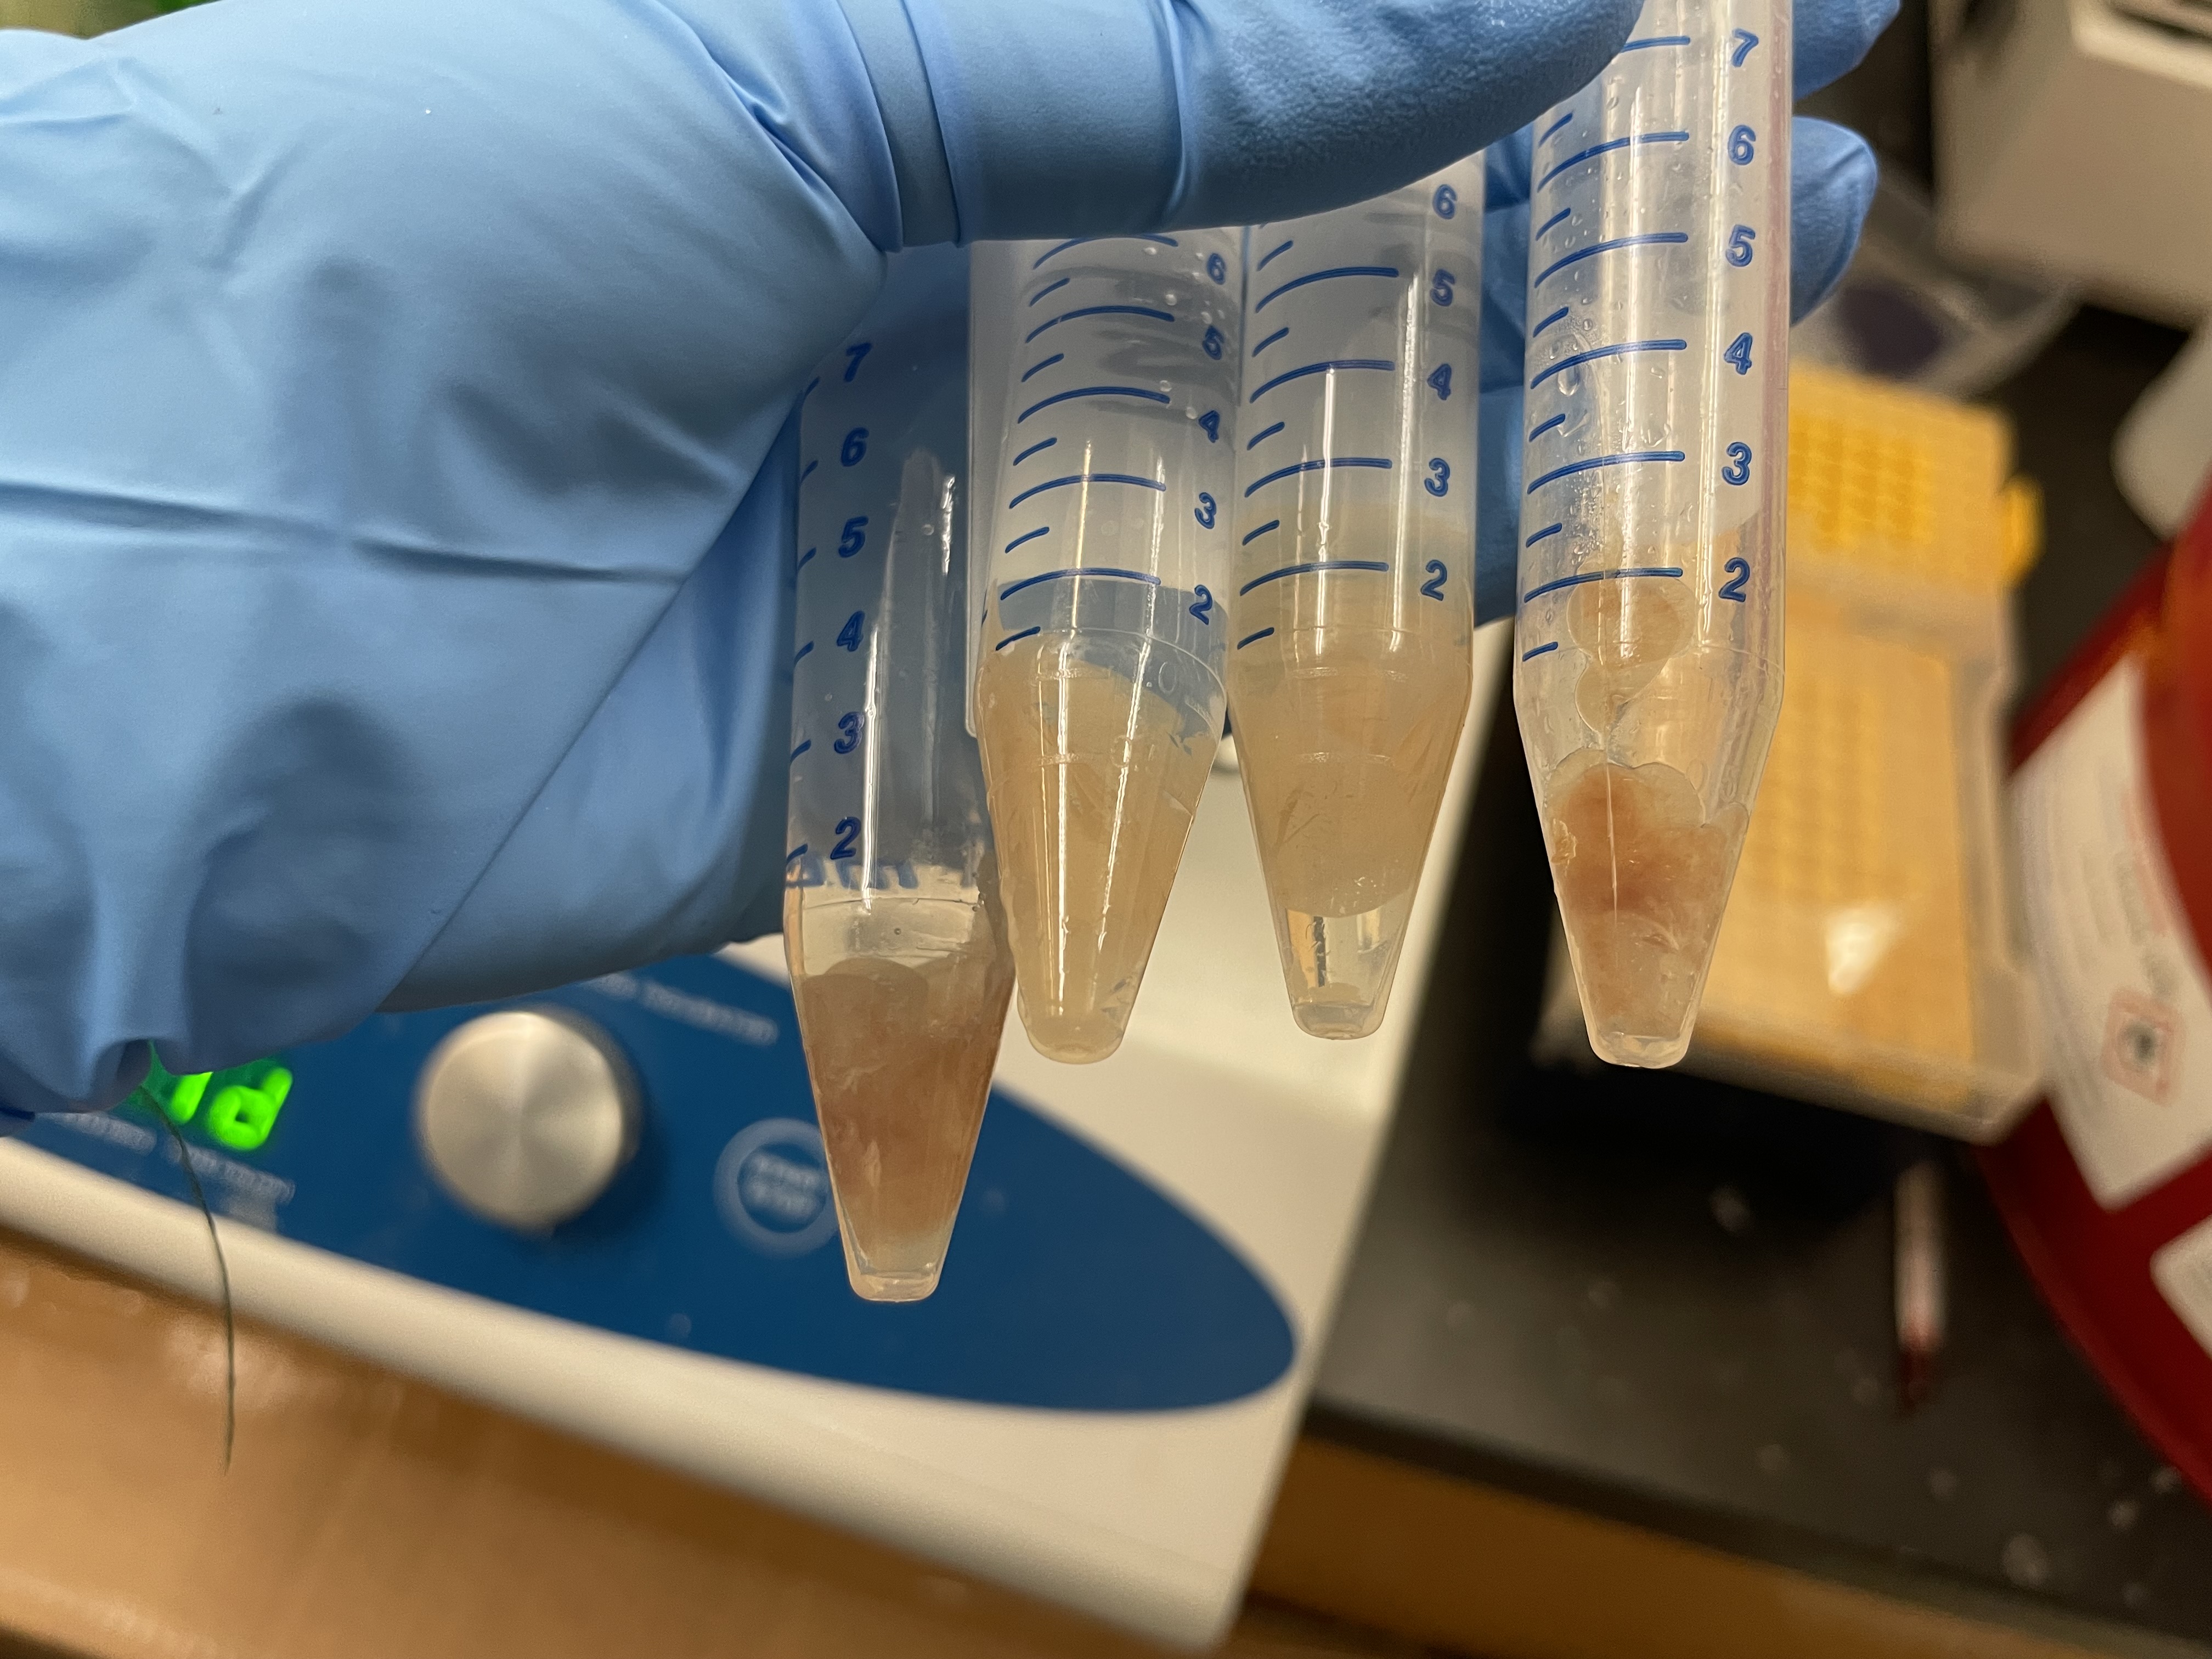
The A1P4 polymerization gone wrong. An expired reagent likely caused the white condensation (which is not supposed to be there).
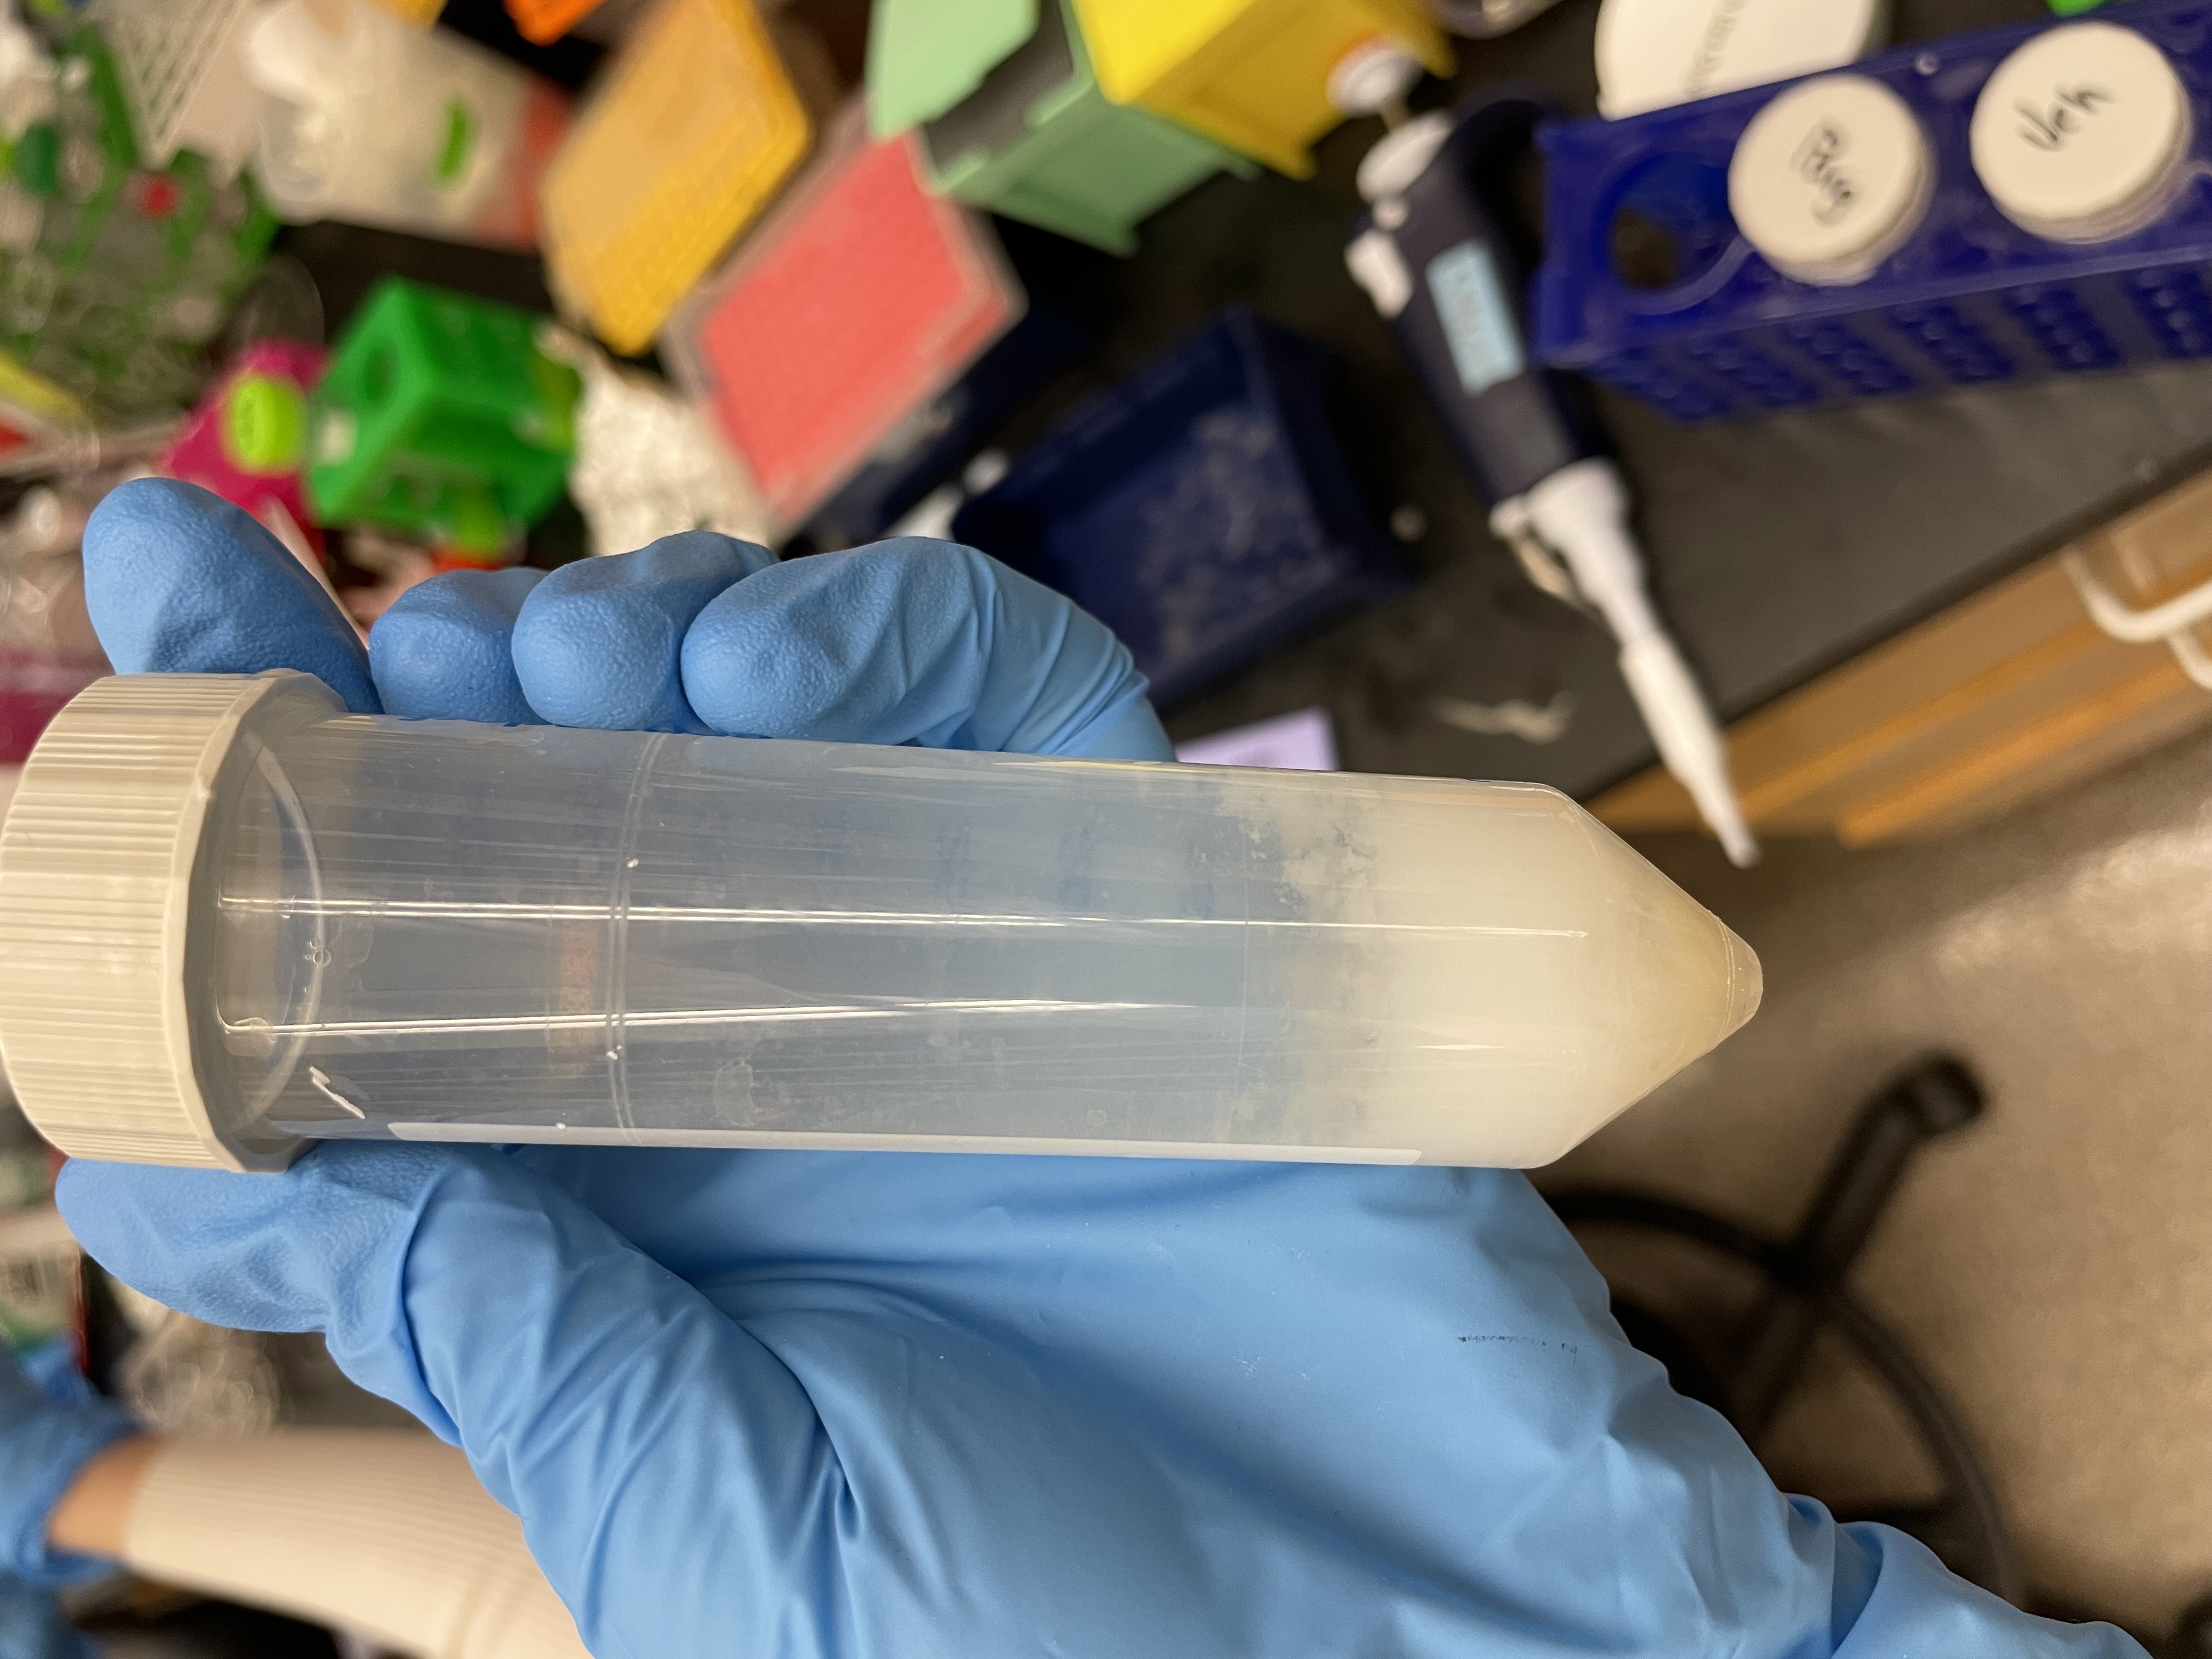
What the A1P4 polymerization is supposed to look like (note how how the buffer around the tissue is clear).
Wednesday was a very chill day at the lab. I spent the morning de-gasing my sample again and re-polymerizing it on the warm shaker for 4 hours. I didn’t have anything else to do while waiting for the polymerization/crosslinking process to finish so I began writing this. When the polymerization was finally over at 3:30 I removed my sample from the shaker and poured out the A1P4 buffer under the fume hood because it contains PFA, which is toxic and can cause dizziness if inhaled. Then, I changed to buffer in the tubes to 6% PBS-SDS (which washes away the unwanted lipids) and placed the tissue samples back on the warm shaker to clear for as long as possible (ideally 48 hours but we were hoping for at least 24). One oddity that I noticed while changing the buffers was that one of my tubes, with the vehicle kidney slices in it, was completely empty even though I had not poured out its A1P4. This baffled me until I looked closer and noticed a minuscule crack in the side of the tube. After replacing it with a new tube and transferring the kidney tissue over, I added SDS and hoped the dried out tissue would rehydrate easily.
On Thursday I came into the lab and immediately checked on my samples. They were more cleared than yesterday but not fully transparent yet, so I refreshed their SDS buffer and left them to clear for another couple of hours. Thursday afternoon was a busy one! Right after lunch I joined my post-doc mentor Ben and watched him do perfusions and harvest the tumors he had implanted 2 weeks ago. He perfused a total of 6 mice, all of which were hairless because they were immunodeficient in order to allow the tumors to grow without being attacked by the mouse’s immune system. During the perfusions, Ben and I had a very insightful discussion (he talked, I listened) about his research with tumor cells and cancer research in general. I learned SO MUCH! For example, I learned that the tumors he was extracting from his mice were actually a type of melanoma and that the mice had been injected with an EGFR (epidermal growth factor receptor) inhibitor drug that blocks activity of the EGFR receptor on cancer cells, thereby slowing the tumor’s growth. I also learned about the Warburg Effect, which is very unusual metabolic characteristic of cancer cells. As you probably know, tumors require massive amounts of energy (ATP) to function and sustain their continuous proliferation, but rather than converting glucose to ATP through oxidative phosphorylation (which is very efficient and produces lots of ATP with relatively small amounts of glucose), tumors prefer to use aerobic glycolysis, (which is very inefficient and typically reserved for creating ATP when no oxygen in present). This unusual characteristic of tumor cells means that in order to acquire enough glucose to grow and sustain themselves, they have to create new blood vessels to bring in more glucose from other parts of the body, a process known as angiogenesis. Possible cancer treatments that are being researched include drugs like VEGF (Vascular Endothelia Growth Factor) suppressors that could limit the creation of new blood vessels in order to halt tumor growth. Furthermore, Ben and I discussed the idea of CAR-T therapy, which is a revolutionary new brand of cancer treatment that involves removing a patient’s blood in order to access their T-cells, then genetically modifying those T-cells to recognize and attack specific cancer cells. The modified T-cells produce chimeric antigen receptors (CARs) on their surface that bind to specific proteins on the surface of cancer cells, thereby leading the T-cells directly to the cancerous cells so they can be destroyed. However, this treatment is extremely expensive and requires high specialization of both equipment and people, so it is not a viable solution for everyone. On the other hand, Ben told me about a very new, groundbreaking idea for cancer treatment that involves harnessing the power of mRNA. mRNA vaccines (like the COVID-19 shot) instruct cells to produce specific proteins (TAAs/TSAs) that trigger the body’s immune system to target and destroy cells. This idea is good because it has the potential to be standardized because it is easily administered and efficient. However, as Ben put it, this has not been done yet because of “an engineering problem, not a science problem,” (meaning that scientists have not yet found the right ‘shield’ of lipids to surround the very fragile mRNA on its way from injection to the cells). Finally, I ended Thursday by washing my organ samples in PBST three times and then once in PBS. I then incubated them in CuSO4 overnight so each tissue sample would have enough copper (II) ions for the CLICK reaction on Friday.

My mounted slide for my experiment. From top to bottom (and left to right): vehicle brain, pargyline brain, vehicle kidney, pargyline kidney, vehicle liver, pargyline liver.
I can’t believe Friday is my last day at the Ye Lab. I have had such an amazing experience and met so many wonderful people and I am so grateful to everyone who made it possible, especially Sarah Holbrooke, my amazing mentor Cailynn Wang, Ben Pang, Jennie Thomas, and all my fellow San Diego interns! Friday morning began by mixing 8mL of the CLICK reaction buffer (which includes DMSO, PBS, an azide, CuSO4, and BTTP). I then pipetted 975 uL into each of my 6 wells containing the best tissue sample for each organ and condition (vehicle or drug for the brain, liver, and kidney) and added 25 uL of sodium ascorbate to initiate the CLICK reaction. After letting the reaction run on the shaker for 1 hour I removed the tissue and washed it with PBST-EDTA 3 times. I finally stained the tissue with the DAPI stain before mounting it on a slide for imaging. Before we turned on the confocal microscope, Cailynn warned me not to be disappointed if no drug signal showed up because it was my first experiment and experiments often don’t go as expected on the first try. To her surprise, however, when we turned the laser to the proper light wavelength (647 nm), there was a strong drug signal from the pargyline in the experimental brain and none in the vehicle/control brain (which was a great result and meant my experiment had been done correctly!). I was so pleased that it had worked because I had struggled a bit with the pargyline injection and we weren’t certain the drug had been properly delivered to the brain. After imaging, Ben treated me to some boba to celebrate my time in the lab and we exchanged parting cards. I said goodbye to everyone in lab and walked out for the final time, so grateful for my experiences there but excited to return to the mountains.
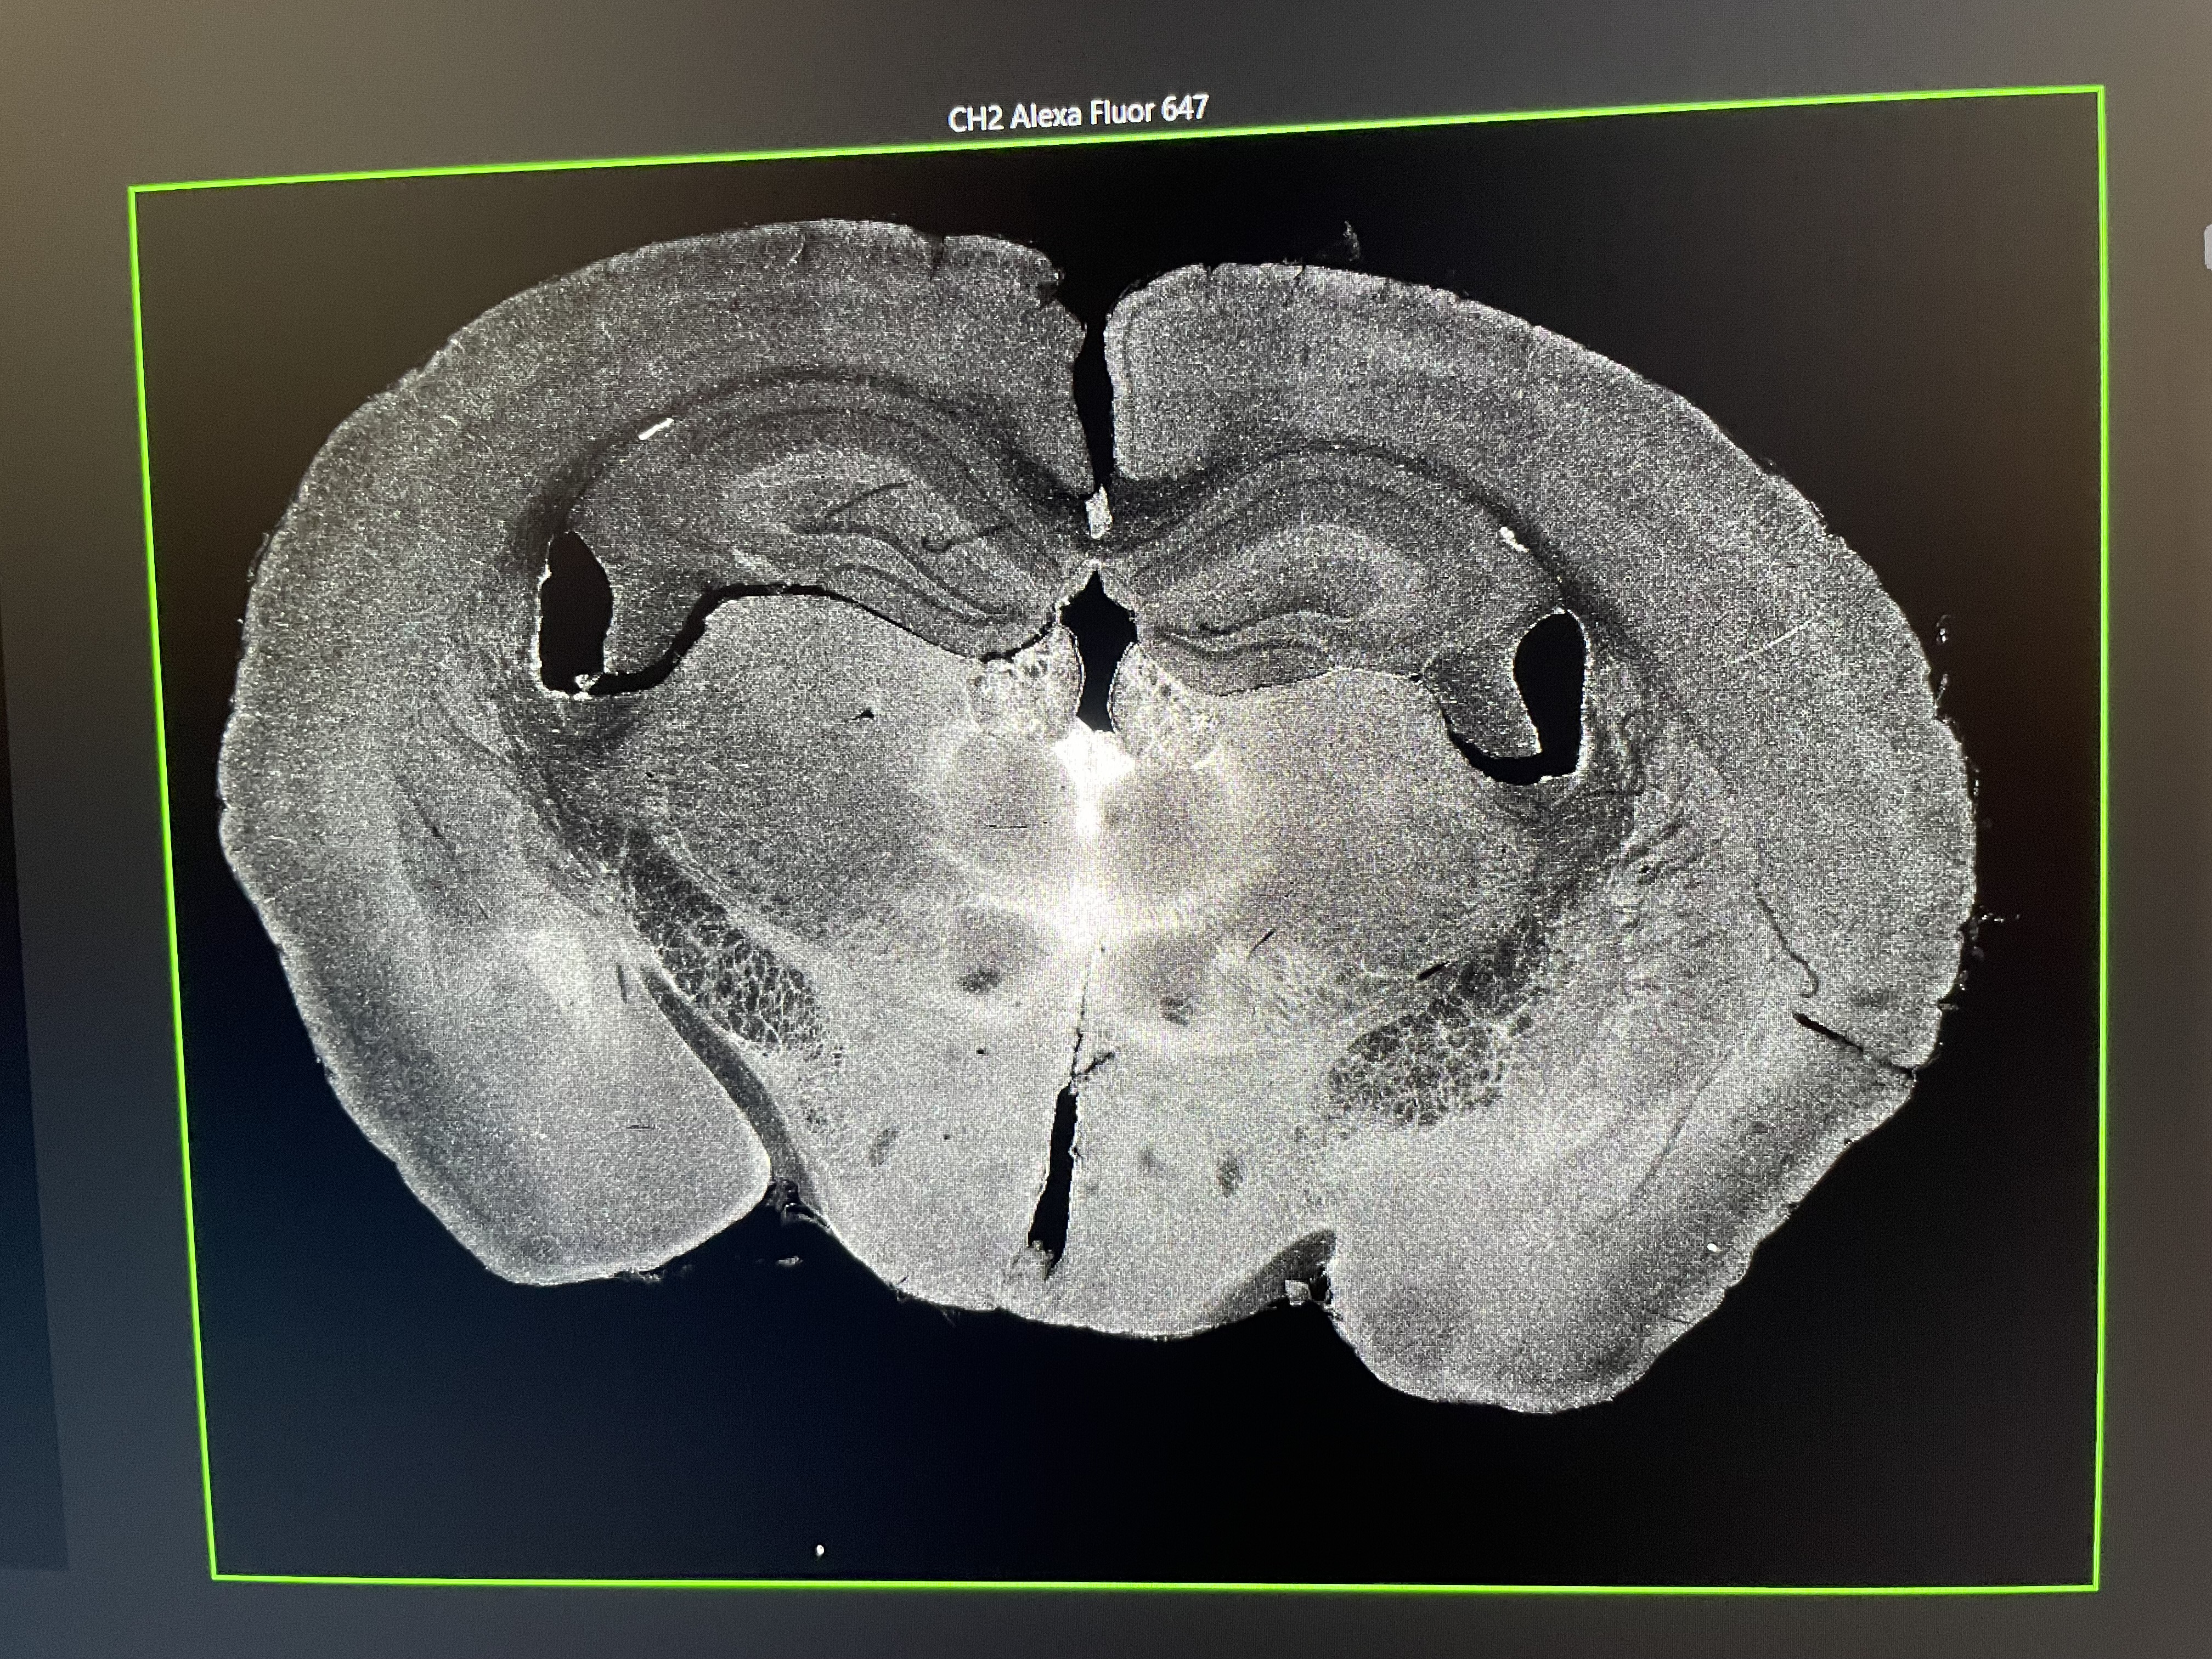
The image of my drug (pargyline) injected brain on the confocal microscope. The white enrichment represents the successful drug signal where it binds in the brain. I discovered that pargyline most prominently binds in the paraventricular nucleus of the thalamus (the brightest white area in the center).
Saturday I began the drive home to Colorado through the hot California desert with my suitcase a little heavier than when I brought it. It was bittersweet to say goodbye to all my roommates but we plan on having LOTS of reunions and I am excited to go home and see my pets! Thank you to everyone who read my blog and followed along on my amazing summer journey!
There are no comments published yet.